Jenkins Role Based Access
By Chathurika Sandarenu
Jenkins out of the box do not have Role based access support. But when using Jenkins in an organization we need to separate the access to different jenkins pipelines based on the user groups. For example developers should not have the access to production related pipelines.
Fortunately there is a Jenkins plugin called “Role-based Authorization Strategy” to facilitate exactly this. It has bit of a complex workflow, but it provides the feature we need :).
1. Install and Configure Role Base Access Plugin

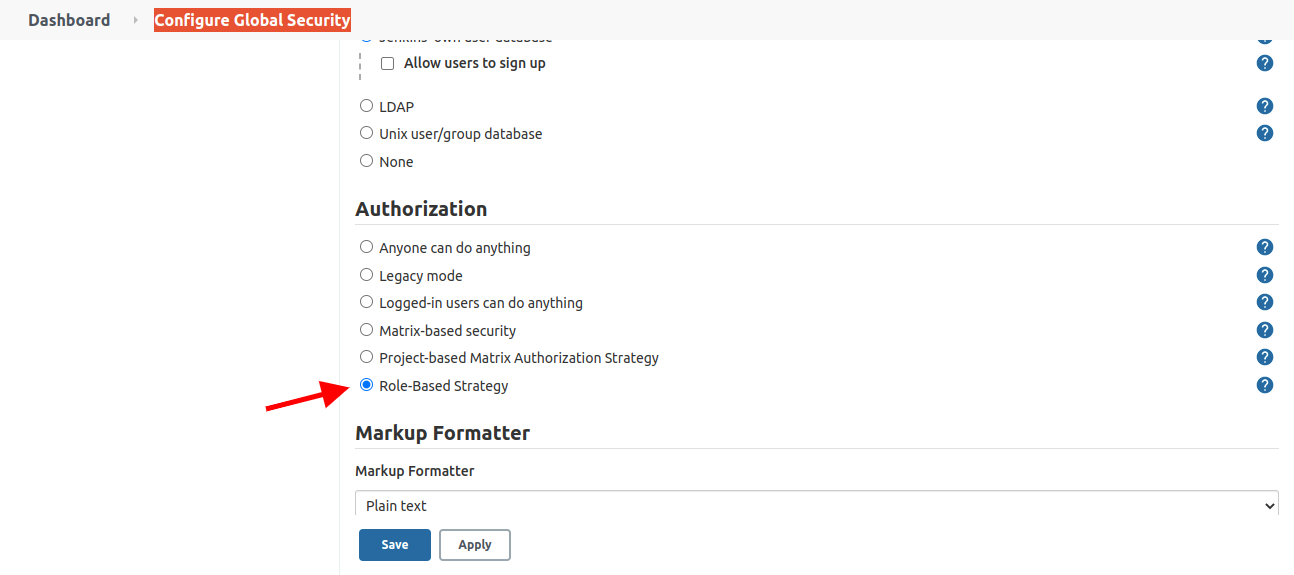
Figure 1 - Enable Role Base Access Strategy
- Select the “Manage Jenkins” -> “Plugin Manager”
- Go to “Available” tab and search for “Role-based Authorization Strategy” and install it and restart jenkins.
- After restart select “Manage Jenkins” -> “Configure Global Security”
- Tick the option “Role-Based Strategy” under “Authorization” section and then press “Save”.
2. Create Roles

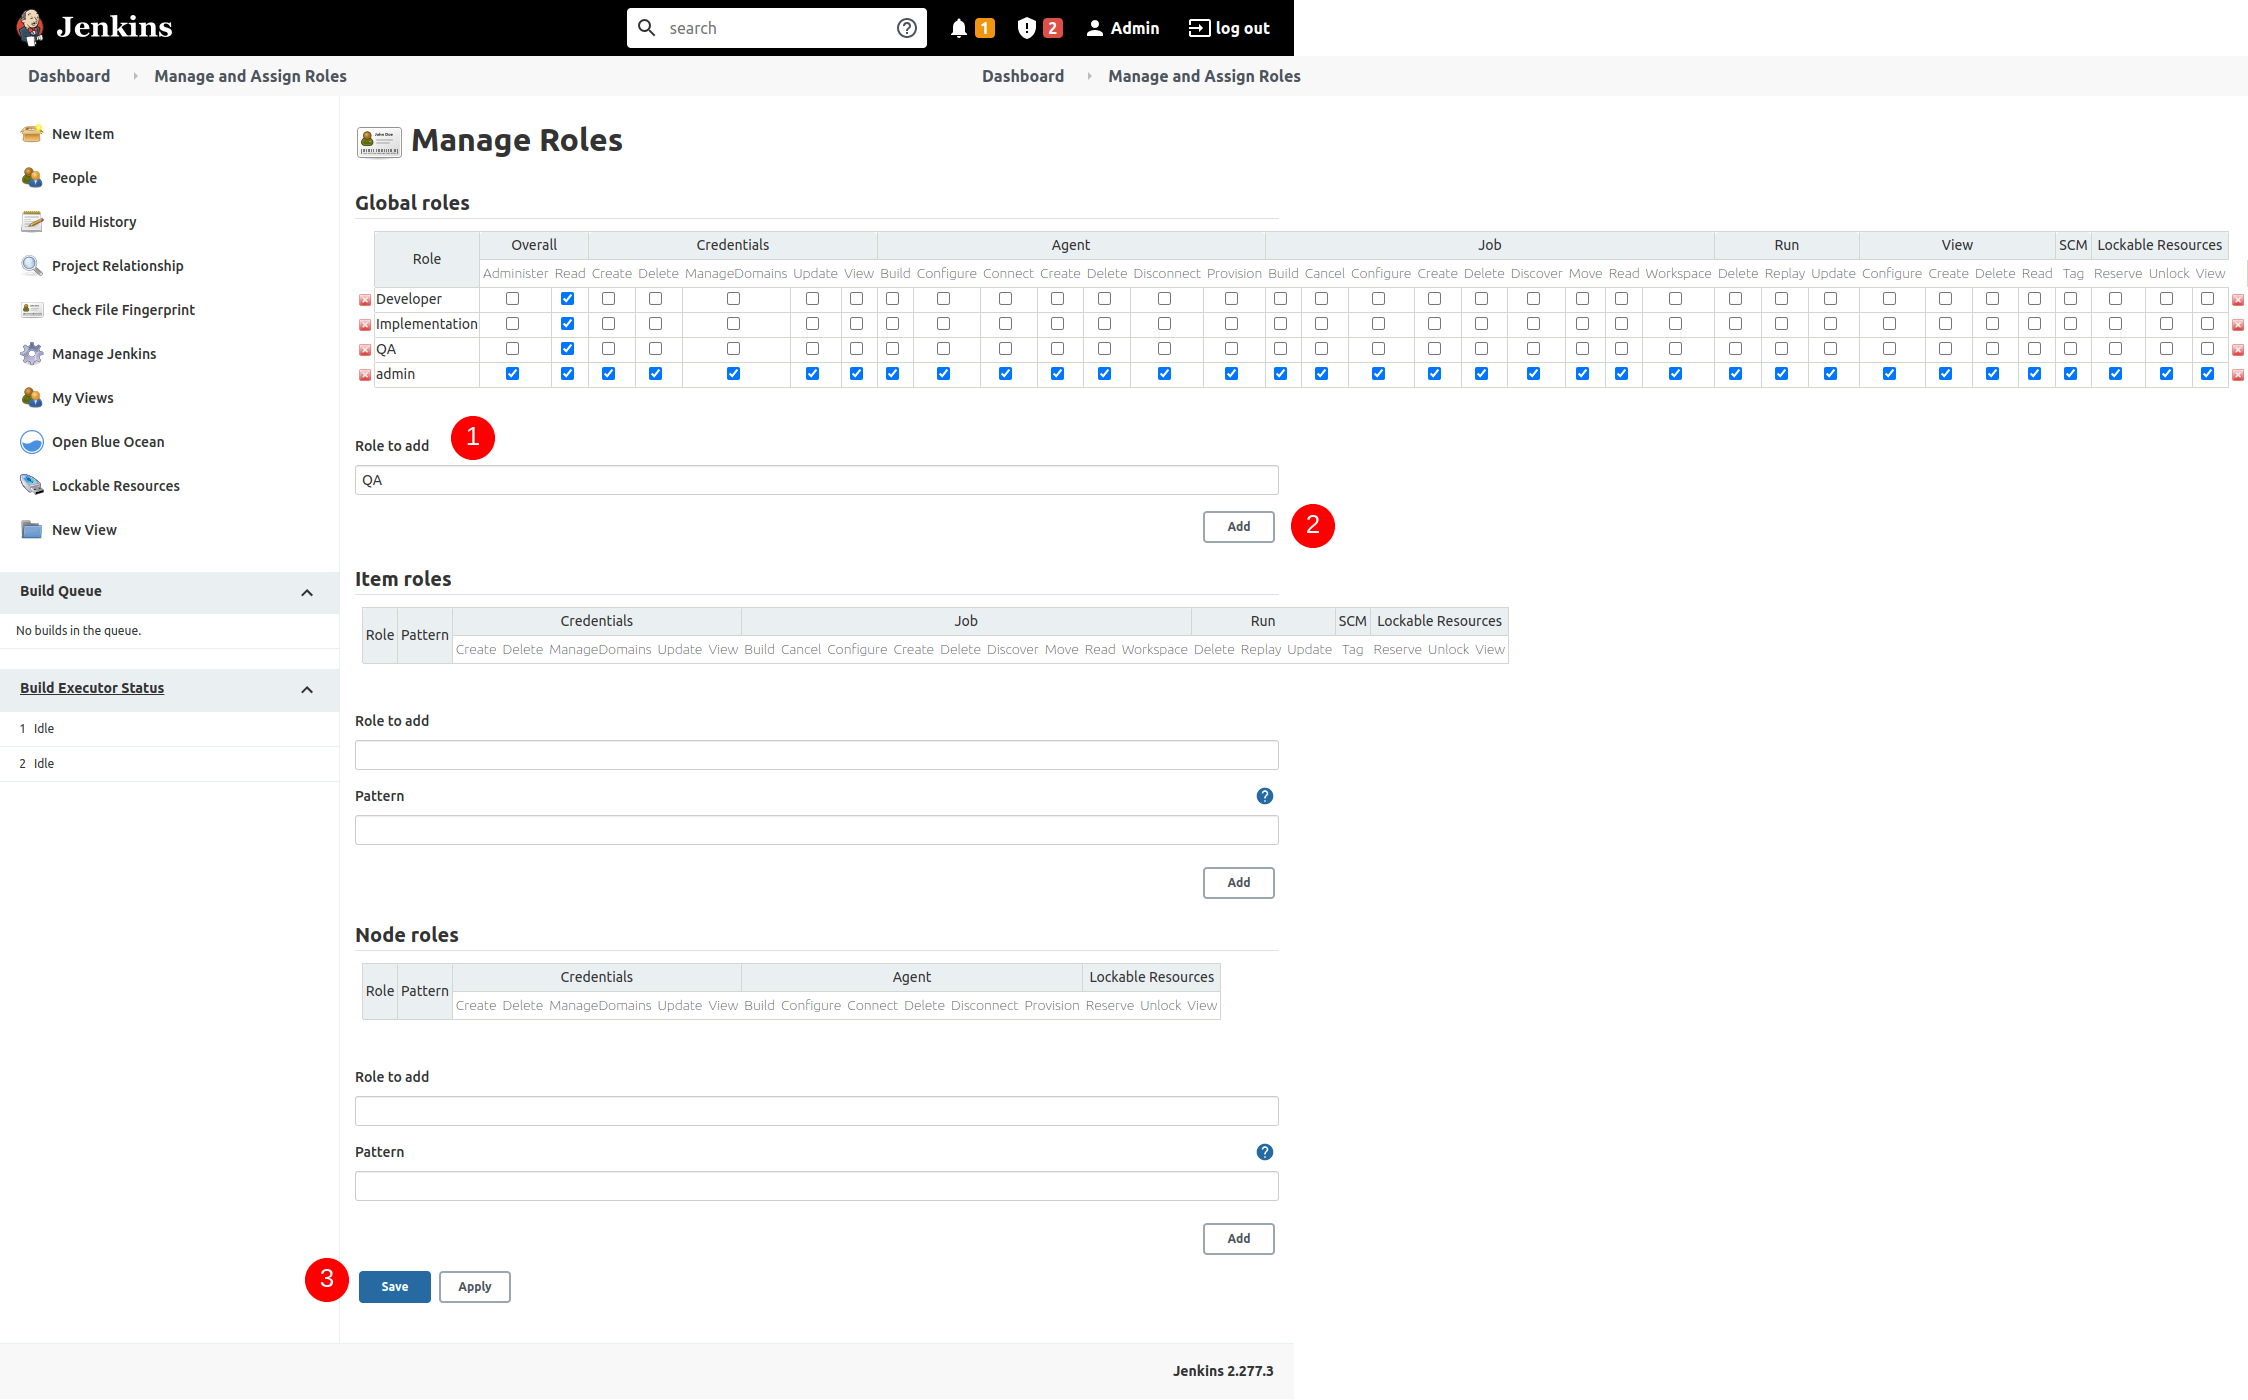
Figure 2 - Create Roles
- Go to “Manage Jenkins” and select “Manage and Assign Roles” option.
- Select “Manage Roles”
- Create the role you want to add under “Roles to add” and then press “Add” button.
- From “Global roles” premissions matrix give read access under “Overall” column.
- Scroll down to the bottom and click “Save” to save the changes.
3. Create User
- Go to “Manage Jenkins” and select “Manage Users” option and select “Create User” option from the sidebar.
- Enter the details as required and create the new user.
- Try login with this new user. You would get “Access Denied” page.
4. Assign User to a Role

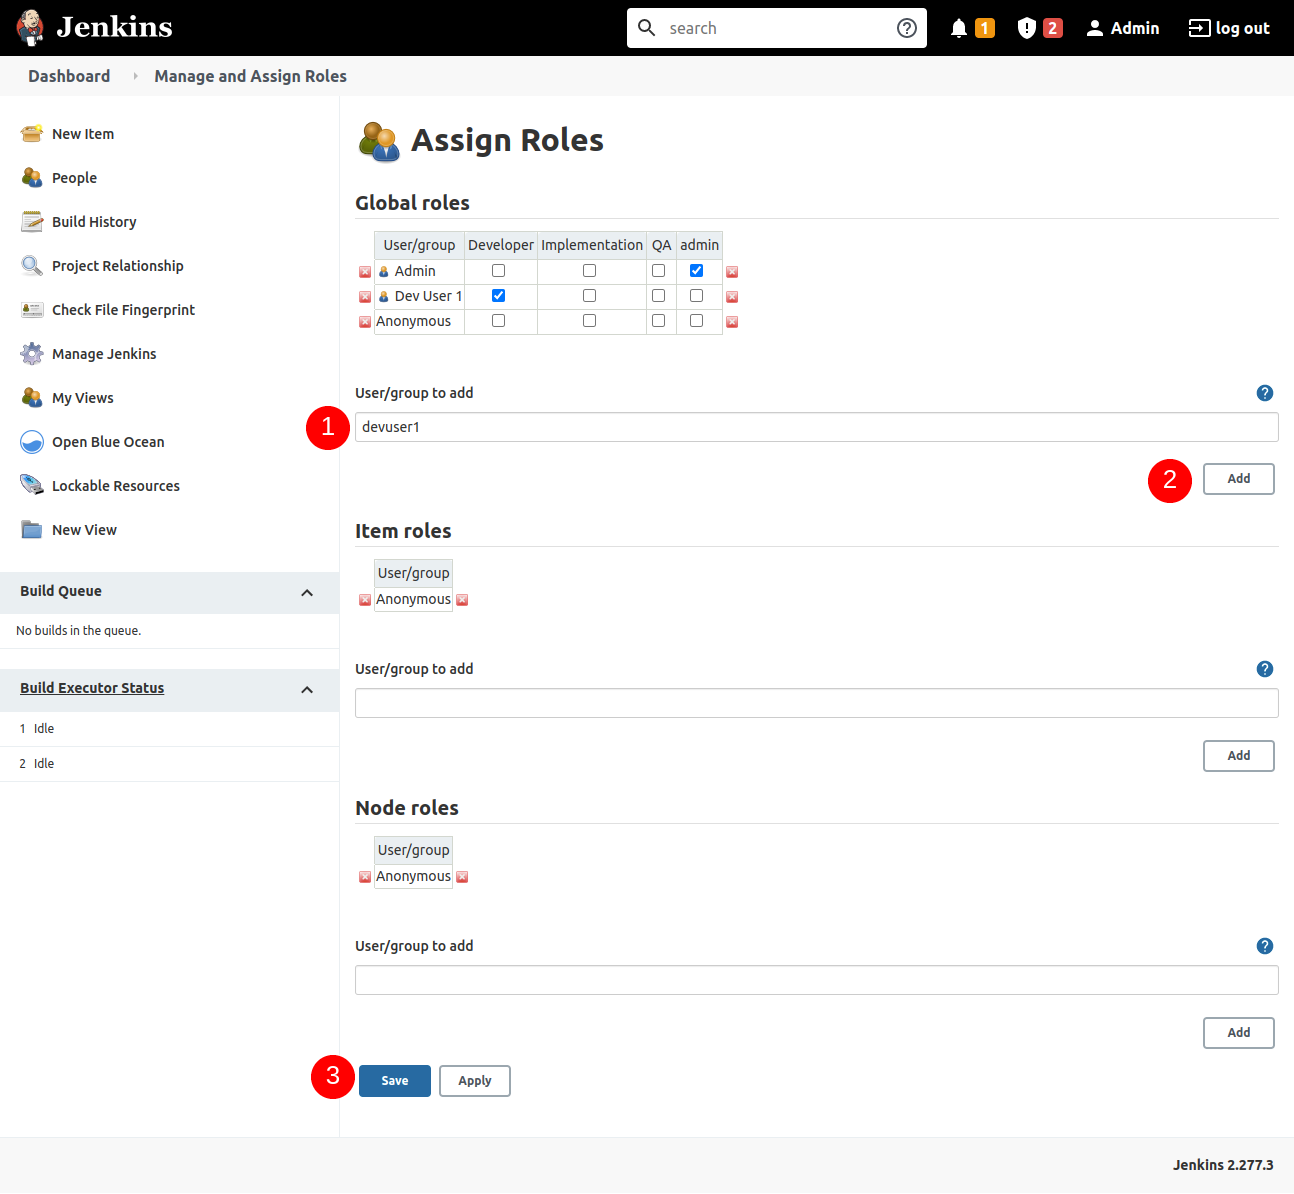
Figure 3 - Add User to a Role
- Go to “Manage Jenkins” and select “Manage and Assign Roles” option again and then go to “Assign Roles” option.
- Enter the username of the user you want to add to the Global Roles in text box “User/Group to add” and press “Add”.
- From the “Global roles” matrix tick on the user group where this user need to be added.
- Once that the ticked click “Save” button at the bottom.
5. Create Folders
Now we have to create separate folders to keep jenkins projects for each of these user groups. For that we can use jenkins folders. To create new folder;
- Select “New Item” -> “Folder”
All the projects accible to specific user group will be created under these folders.
6. Assign Folder to User Group

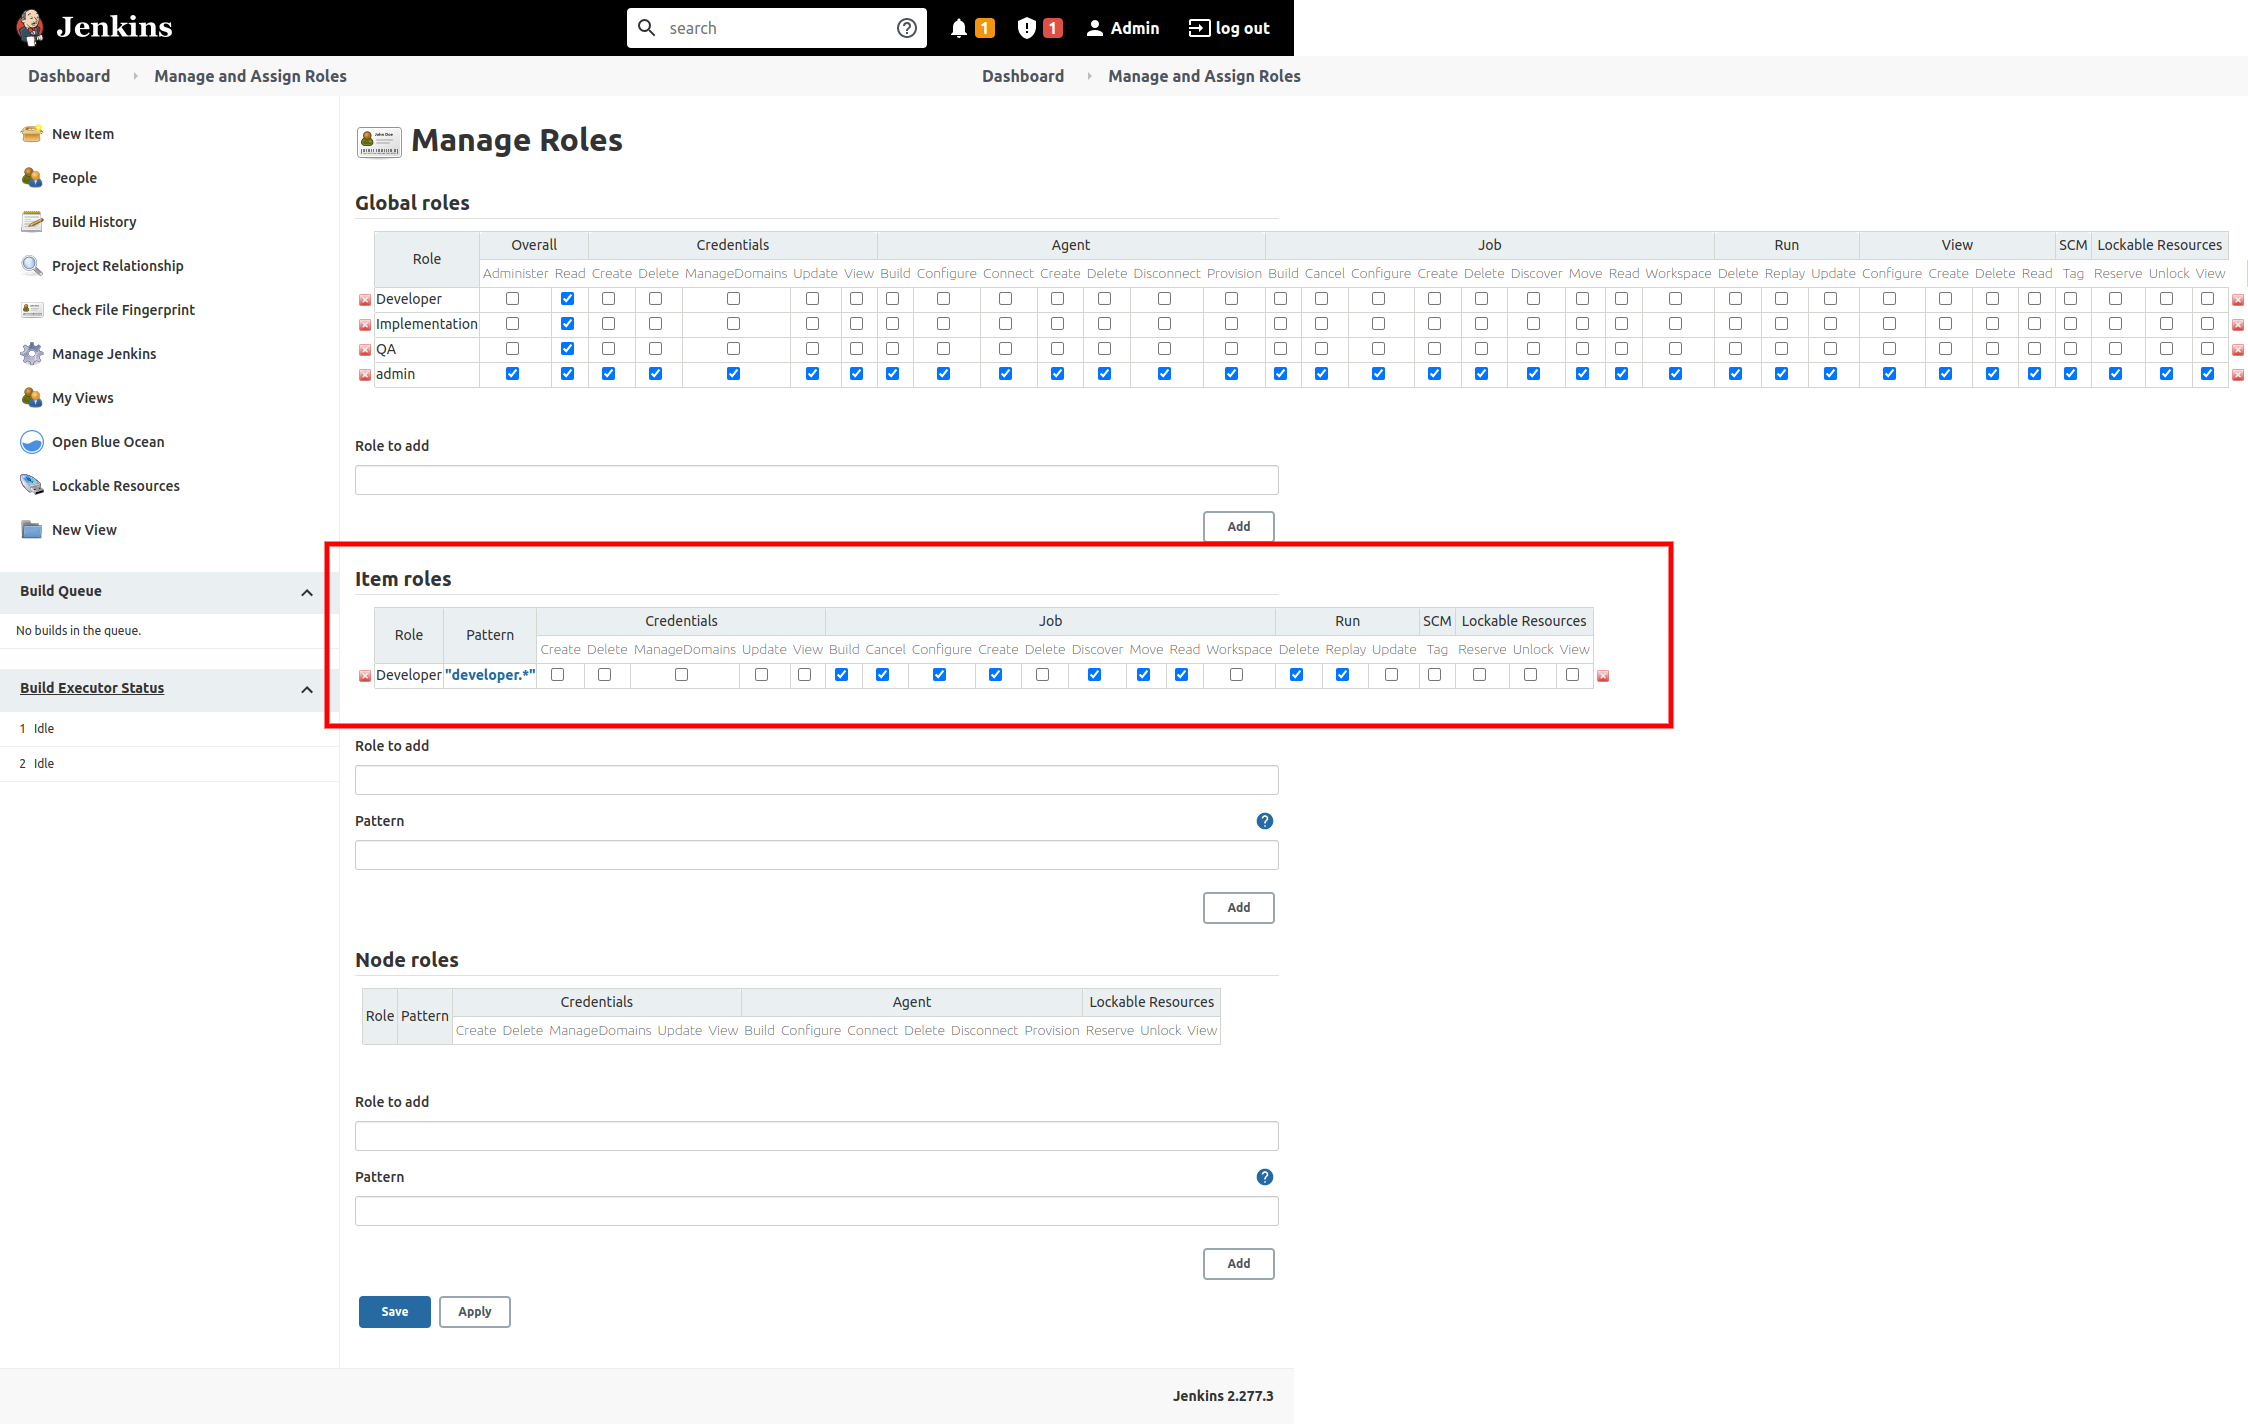
Figure 4 - Assign Folder to User Role
- Go to “Manage Jenkins” -> “Manage and Assign Roles” -> “Manage Roles” option again and then go to “Item roles” option.
- Enter the role name as “Role to add” and the name of the folder we created above as “Pattern”. Here you have to give in
<Folder Name>.*format. - Then give the “Job” and “Run” permission to this folder pattern from the “Item Roles” matrix.
- Then click “Add” and final click “Save” at the bottom.
Now when you login with the specific user, you will only be able see the pipelines inside your designated folder.